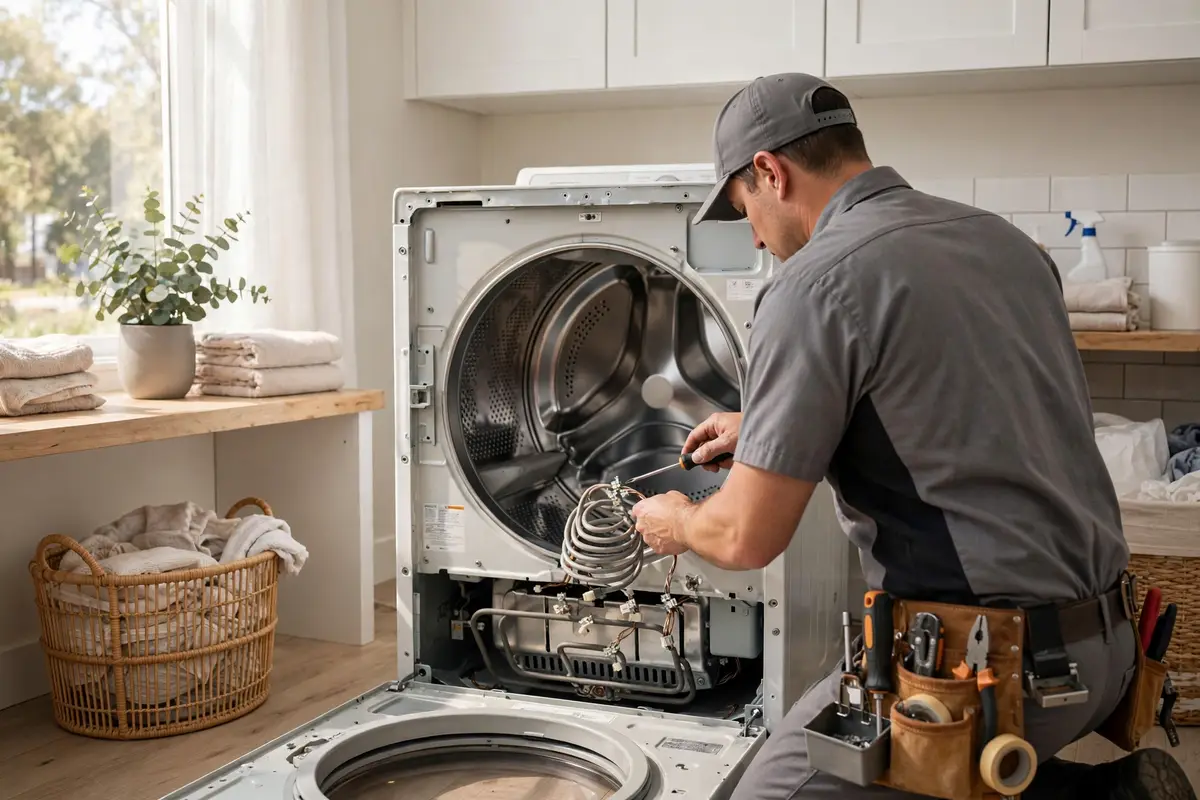
A dryer that tumbles without heating is one of the most deceptive failures in the house, because everything sounds normal. The motor runs, the drum turns, the controls light up — the machine is doing three of its four jobs. Only the heat is gone. The good news is that a no-heat dryer has a short, well-understood list of causes, and most of them are inexpensive parts that fail in predictable ways. The important news is that one cause on that list — a clogged vent — is also a genuine fire risk, so a dryer that stops heating deserves prompt attention rather than weeks of running double and triple cycles. Here is the full diagnostic path our technicians follow on dryer repair calls in Gastonia, including what you can check yourself before you pick up the phone.
Start With the Two-Minute Checks
Before assuming a part has failed, rule out the two impostors. First, the cycle selection: an air-fluff or no-heat cycle produces exactly this symptom by design, and wrinkle-guard and eco modes on some models run much cooler than owners expect. Set the dryer to a timed dry on high heat for the test — sensor cycles can end early and confuse the diagnosis. Second, run the dryer empty for five minutes and check whether the air inside is even slightly warm. Slight warmth that fades suggests an airflow or cycling problem; stone-cold air from the first minute suggests the heat circuit never energized at all. That one observation cuts the suspect list in half, so do it before anything else.
The 7 Causes of a Dryer That Won’t Heat
1. Blown thermal fuse
The thermal fuse is a small, one-time safety device wired into the heat circuit. If the dryer overheats — even once — the fuse opens and cuts power to the heating element or burner permanently. It does not reset, and it is not supposed to: it is the dryer’s way of refusing to run hot until someone finds out why it overheated. A blown thermal fuse is the most common single finding on no-heat calls, and it is also the most misunderstood, because replacing the fuse without fixing the overheating cause just buys a second blown fuse, sometimes within the week. Nine times out of ten the underlying cause is restricted venting. A technician tests the fuse for continuity with a multimeter in seconds; the real work is the vent inspection that should follow it.
2. Failed heating element (electric dryers)
An electric dryer heats with a coil of resistance wire, much like a giant toaster element, mounted in a housing at the back or side of the drum. After years of heat cycling, the coil fatigues and breaks — sometimes visibly, sometimes at a single hidden point. A broken element means zero heat but perfectly normal tumbling. Elements can also short against their housing, which produces the opposite complaint (heat that will not turn off) and is a more urgent repair. Element replacement is a straightforward, mid-cost repair on most Whirlpool, Samsung, LG, GE, and Maytag models, and it is one of the parts we carry on the truck for exactly that reason. Testing is definitive: a good element shows continuity and a specific resistance; a broken one reads open.
3. Bad igniter (gas dryers)
Gas dryers do not have an element; they have a burner, and the burner is lit by a silicon-carbide igniter that glows white-hot to ignite the gas. Igniters are fragile and age out — after enough heating cycles the igniter cracks or its resistance drifts until it can no longer reach ignition temperature. The symptom pattern is distinctive: the dryer may heat for the first few minutes or first load, then quit, because a marginal igniter works when cold and fails as it heat-soaks. You may also hear the gas valve click without the whoosh of ignition. Igniter replacement is a common and affordable gas-dryer repair, but anything involving the gas train after the igniter — valves, coils, burner adjustments — belongs to a technician, full stop.
4. Failed cycling thermostat or high-limit thermostat
Two thermostats govern a dryer’s temperature. The cycling thermostat turns the heat on and off to hold the selected temperature; the high-limit thermostat is the backup that cuts heat if the drum gets dangerously hot. Either can fail. A cycling thermostat that fails open gives you no heat at all; one that fails erratically gives you a dryer that is hot for ten minutes and cold for twenty, leaving loads in a frustrating half-dry state. A tripped high-limit usually means the dryer genuinely overheated — again, venting is the first place to look. Thermostats are inexpensive parts, but they must be matched to the model’s temperature ratings, which is why the model number matters more than the part’s appearance.
5. Clogged vent or crushed vent hose
This is the cause hiding behind half the others on this list. A dryer moves a large volume of hot, moist air, and that air has to exit the house through the vent run. Lint accumulates in every elbow and sag; birds occasionally nest in exterior caps in Gaston County; and the flexible hose behind the dryer gets crushed flat when the machine is pushed back against the wall. When exhaust air cannot escape, heat builds inside the cabinet, drying times lengthen, and eventually the thermal fuse or high-limit thermostat does its job and kills the heat. The diagnostic clue is a dryer cabinet or laundry room that feels unusually hot and humid during a cycle, and a weak trickle of air at the outside vent cap when there should be a strong blast. No heat repair is complete until airflow is verified — this is the step skipped by every cut-rate repair that fails again in a month.
6. Control board or timer failure
On electronic models, a relay on the control board switches power to the heat circuit; on older mechanical models, contacts inside the timer do the same job. A burnt relay or worn timer contact interrupts heat while everything else works. This cause is less common than fuses and elements, but we see it regularly on dryers past the ten-year mark and after electrical storms — power surges through Duke Energy lines during Gastonia’s summer thunderstorms are hard on boards. Board failures can be intermittent at first (heat that comes and goes with no pattern), which makes them the trickiest diagnosis on the list and the one most often misdiagnosed as an element by guess-and-swap repairers. Proper testing isolates the board before anyone orders one.
7. A lost leg of 240-volt power (electric dryers)
Here is the cause that fools the most people. An electric dryer runs on 240 volts, but the motor and controls only use one 120-volt leg, while the heating element needs both legs to produce heat. If one leg of the circuit drops out — a half-tripped double breaker, a failed breaker pole, or a burnt connection at the receptacle or terminal block — the dryer will tumble, light up, and run a “perfect” cycle with absolutely no heat. Before any parts are suspected, the outlet should be tested for a full 240 volts and each leg checked. Resetting a double breaker fully off and back on fixes a surprising number of these. A burnt terminal block or receptacle, though, is a replace-don’t-reset situation, and it is a fire hazard in its own right.
| Cause | What you can check | Professional fix | Typical cost |
|---|---|---|---|
| Thermal fuse blown | Confirm the dryer overheated or the vent is restricted (see below) | Replace fuse and correct the overheating cause | $110–$180 |
| Heating element failed | No safe visual check — note zero heat from minute one | Replace heating element assembly | $160–$280 |
| Gas igniter failed | Note whether heat works on the first load, then quits | Replace igniter; inspect burner and gas coils | $140–$240 |
| Cycling / high-limit thermostat | Note hot-then-cold cycling within a single load | Replace thermostat set with correct ratings | $120–$210 |
| Clogged or crushed vent | Check airflow at the outside vent cap during a cycle | Full vent cleaning and hose replacement | $100–$190 |
| Control board / timer | Note random heat loss with no pattern; recall recent storms | Test and replace board or timer | $190–$350 |
| Lost 240V power leg | Fully reset the double breaker off, then on; retest | Replace burnt receptacle or terminal block | $110–$220 |
Ranges are typical parts-and-labor totals in Gastonia; overall dryer repairs run $100–$350. The $79 diagnostic is waived when you approve the repair. Compare the full picture in our washer and dryer repair cost guide.

What You Can Safely Check Yourself
- Confirm the settings. Timed dry, high heat, and confirm nobody selected an air-only or eco cycle.
- Clean the lint screen — and wash it with soap and water if you use dryer sheets, because the invisible film they leave restricts airflow even when the screen looks clean. Let it dry fully before reinstalling.
- Check the outside vent cap while the dryer runs on a heat cycle. You should feel a strong, warm blast. A weak flow, a cap that barely opens, or lint plastered around the opening means restricted venting.
- Look behind the dryer (carefully, without yanking the gas line on a gas model) for a crushed or kinked exhaust hose, and make sure the machine is not pushed tight against it.
- Reset the breaker properly. For electric dryers, switch the double breaker fully off, then back on. A half-tripped breaker is exactly the failure described in cause 7.
- Run the five-minute empty test and record the result: no heat at all, heat that fades, or heat on the first load only. That one sentence saves real diagnostic time.
Stop there. Testing fuses, elements, and thermostats means opening the cabinet and working around 240-volt circuits and, on gas models, a gas train. That is the line between homeowner checks and technician work, and it exists for good reason.
The Fire-Safety Angle Most People Miss
Clothes dryers are involved in thousands of house fires in the United States every year, and failure to clean the venting is the leading contributing factor identified by fire investigators. Lint is exceptionally flammable, and a restricted vent does two dangerous things at once: it traps heat inside the dryer cabinet, and it deposits lint in exactly the places that heat reaches. A dryer that has stopped heating because its thermal fuse blew has, in a real sense, already warned you once — the fuse sacrificed itself because temperatures went somewhere they should not. Replacing the fuse while ignoring the vent removes the warning system and keeps the hazard. If your dryer has blown a fuse, takes two cycles to dry, makes the laundry room hot and humid, or the outside cap shows lint buildup, treat vent cleaning as part of the repair, not an optional extra. It is also the cheapest performance upgrade a dryer can get: a clear vent routinely cuts drying time by a third.
When to Call a Professional
Call when the breaker reset and the basic checks do not restore heat, when you smell burning or see scorch marks at the outlet or terminal block, when a gas dryer clicks repeatedly without igniting, or when the dryer cabinet gets hot to the touch — all of those have moved past DIY territory. Also call rather than guess if the dryer is under any parts warranty or if a previous no-heat repair has already failed once; a repeat failure means the root cause was missed, and a fresh diagnostic is cheaper than a third wrong part. When you call us, the model number (on a sticker inside the door frame) and your empty-test result are the two most useful things you can have ready. Most no-heat repairs — fuses, elements, igniters, thermostats — are completed in one visit, and if the quote ever approaches replacement territory on an older machine, we will walk you through the same math in our repair or replace guide before you decide.
What the Repair Involves, and Prevention That Actually Works
A proper no-heat service visit tests the heat circuit in sequence — power supply, fuse, thermostats, element or igniter — verifies vent airflow with the dryer running, and only then replaces the failed part. You approve a written quote first; the $79 diagnostic comes off the total when you do. Repairs carry a written 90-day minimum warranty on parts and labor. To keep the heat on afterward: clean the lint screen every load, have the full vent run cleaned every one to two years (annually for long or elbow-heavy runs), leave a few inches between the dryer and the wall so the hose cannot crush, and avoid overloading — a drum packed solid cannot tumble clothes through the hot air, which lengthens cycles and cooks the lint that does accumulate. A dryer that dries a normal load in one cycle is a dryer whose vent, fuse, and element are all healthy; the moment it needs two, it is asking for attention.
Need a hand? Request service online or call (704) 270-4863 for same-day dryer repair across Gastonia and Gaston County. And if the problem turns out to be on the cold side of the laundry room, our guide to a refrigerator not cooling is the kitchen counterpart to this one.